
Submit your photos for consideration as a Weekly Inspiration by adding them to the Flickr Group.
Friday, May 29, 2009
Wednesday, May 27, 2009
Quick Tip #7 - Rubber Stamps
 I know the schedule is a bit jumbled this week. I usually do the long post on Wednesday and Monday's is short but I didn't want to wait to put up Jen's great guest post. So you're getting a Quick Tip today.
I just had some rubber stamps made which I've wanted for a while but I needed a logo first. I have my logo now so I had the stamps made. They are so useful to have.
What can they be used for?
Stamping my shipping boxes (think of how Amazon brands their boxes)
Tags
Gift Boxes
Receipts
Stationary
Envelopes
Cards
How much did they cost?
Cost of course depends on who makes your stamps. I used RubberStamps.net, the 3"x1.5" stamp cost $11.95 and the tiny one was $3.95. So they are very affordable. If you're ambitious you can even try carving one yourself.
RubberStamps.net
Carving Rubber Stamps
Monday, May 25, 2009
From Muse to Model
As promised here's the very first guest post for the blog written by Jen Kiaba about working with models to photograph your clothing designs.

So here you are – a young designer with several great pieces or an entire collection of unique clothing that you are ready to share with the world. Great! But until you have images of that clothing, the sales aren’t exactly going to be pouring in. Luckily, you have several options to explore in the journey to having images as creative as you are.
Together we’ll take a look at four different options. Each has its pros and cons and associated costs – either monetary or time based.
 If you happen to be a multi-talented individual who feels as comfortable in front of the camera as behind, this may be a great option for you. You have complete creative control and will likely be the person most enthusiastic about your product (at least in the beginning!).
Pros – If you have your own camera and a suitable space to photograph yourself in, then all of a sudden you are a package deal. You can work when you feel like it and won't have to deal with scheduling difficulties.
Cons – This would probably be one of the more frustrating and time consuming options; ask anyone who has photographed their own self portrait and they will tell you that it is a difficult task.
You also need to have at least a basic knowledge of photography and the art of modeling (yes, it is an art).
All of the clothing has to fit you.
Cost: $0, except you may get a few gray hairs...
2) Ask a friend
 When I first started out in photography, this was my go-to option for everything. And let’s face it, in today’s culture most everyone wants to be photographed. It is likely that many of your friends will be thrilled that you asked them to model for you.
If you don’t own your own camera, or don’t feel comfortable enough to be the photographer, this is also an option you can go to in order to have someone else photograph your work.
The fun part of this option is that most of us have a pool of friends who are very talented; some can do hair & makeup, others are creative conceptual geniuses. If you are able to get them all on board, your photoshoot could be a symphony of mind-blowing proportions.
Cons- We all have a few flaky friends. Sometimes getting a shoot organized can be difficult.
Will your friends take the shoot seriously or will they goof off? If they are simply there to have fun, this can be a serious strain in the relationship for the future.
Unless your friend actually is a model (or a religious watcher of America’s Next Top Model) they may not know how to model your clothing and the pictures could end up simply mediocre.
If you ask “Suzy” to model, but you don’t ask “Jane” there could be a crisis in your friendship. You could spend more time putting out fires and repairing fences than is necessary
Cost: $0-$30, depending on the price of pizza.
 So maybe none of your friends have the shape or the look to fit your clothing; maybe they are just camera shy. Either way you are now left with the reality that you have to find a real model to pose for you.
There are a lot of different resources to find models and photographers who will work on a Time for Prints basis. You may also see people advertising their services on a TFCD basis. This means Time for CD. Essentially all that they want out of the deal is a couple of good images for their portfolios.
What I love about this system is that it is all about bartering. We each have something to offer each other: you as a designer get someone to model and/or photograph your clothing. The photographer and the model each get much needed images for their portfolio.
While you can find some fantastic professionals who will work on a TFP basis, for the most part you may be working with many amateurs. You have to be very diligent in reviewing people’s portfolios to make sure they can provide you with the images you want.
Once you have a couple of interested parties lined up, arrange to meet with them! Grab a cup of coffee and get a feel for the person. Possibly take them up to your studio and let them take a look at your work. Gauge how they react to your work. Remember, you want to work with someone who respects what you create. Ideally try to find someone who falls in love with your clothing; not only will they have potential to be a better model, but again you will get great word of mouth advertising!
Also keep in mind that this is your opportunity to help promote other artists! If you find a great model/photographer/makeup artist, let the world know! Add a thank you to them and a link to their work somewhere in your shop. Tweet about them, blog about them. You get the idea!
Pros – There are a ton of sights dedicated to helping models, photographers, designers, and makeup artists connect. Check out sites like http://www.onemodelplace.com and http://www.modelmayhem.com to start.
You can also post free ads on Craigslist and any web forums that you may be active on.
You can retain creative control and direct where and how the shoots will be conducted, as well as guide the concept and look of the shoot.
You can find great people to work with and build a relationship; eventually you might have a great team to work with!
Cons – Unfortunately there are a lot of people out there who want to be models & photographers because of the supposed glamour of the industry. You will have to wade through a lot of unsuitable hopefuls in order to find exactly what and who you are looking for.
There may be ego involved. If you are not established yet, make sure not to let anyone walk all over you. Remember, you are still providing a service!
Cost: $0 (pizza optional), however the cost in terms of time to research and interview may be high.
 Let’s face it – money talks. If you are handing someone a paycheck after a shoot, they will consider you legitimate and will most likely check their ego at the door.
Also when there is an exchange of money, you gain certain legal rights as a contractor. Essentially when you agree to hire someone for a shoot and you have set the parameters (date, time, location, duration) and they agree, you have created either a verbal or a written contract. If they renege, you have a little bit of recourse. If a model does not show, you may be able to bill him or her for your time.
You may also get better results with a professional. But don’t ever assume that someone knows what they are doing just because they are selling their services. I have seen many awful professional photographers out. So, again, do your homework. If you are going to pay someone to either model your creations, or to photograph them, make sure that they are worth every penny that you are paying them!
Another important area to research is what a professional photographer’s policies are in terms of ownership. Do they own their negatives – meaning that you have to pay them for every single image used? What exactly do you walk away with after the shoot? Will they make you sign a release so that they can use images from your shoot to advertise themselves? Read all of the fine print that they put in front of you!! If your landlord or your uncle is a lawyer or your friend is in law school, have them take a look at everything before you sign it! You are your brand and you want to make sure that no one can take advantage of that.
You can be very specific in your wants and expectations for the shoot; after all, you’re paying for it!
You can pre-interview everyone. If they don’t meet your needs or don’t jive with your sensibilities, you can move on to the next candidate.
Legal recourse – hopefully it will never come to that. If it does, you have that in your back pocket.
Cons – Expense! While the cost of hiring professionals can vary, you will be shelling out cash one way or the other.
You have to also consider how cost effective it is to pay someone – can you shoot enough clothing and then sell enough clothing to make a profit after the cost of models and photographers?
Cost: varies; expect to spend at least a modest sum.
 So that’s a lot to take in and consider. Before you jump to one option or the other, take a look at your company and ask yourself what you need and what you can afford. Do you need high end images? Is that even what your company is about?
It is important to understand your customer base and know what kind of images they will be most drawn to. It may very well be that a snapshot of your friend having a great time and wearing your clothing is exactly what your market will be thrilled with. So do a little research. Also take a look inside and ask yourself what you want to express with your product and with your images. Do you know how to create those images? Would a local college student enrolled in the photography department know how to do it?
 My overall advice is to find people that you enjoy working with and continue to work with them. Whether they be your friends, aspiring artists, or professionals – if you have a great rapport, it will show!
If you ever have any questions, you can always drop me a line and I will do my best to give you an answer. Email me at Jen [at] Jenkiabaphotograpy.com
Jen Kiaba is a professional photographer and the owner of Jen Kiaba Photography. She consistently works with artists, models and designers in creating vibrant and exceptional images for their portfolios. With years of experience under her belt, she is also passionate about helping young models and designers connect to create fun and fresh images to promote their products. To check out her work, visit http://jenkiabaphotography.com
From Muse to Model
How to go about finding models and photographers
to advertise your clothing line
By Jen Kiabato advertise your clothing line
So here you are – a young designer with several great pieces or an entire collection of unique clothing that you are ready to share with the world. Great! But until you have images of that clothing, the sales aren’t exactly going to be pouring in. Luckily, you have several options to explore in the journey to having images as creative as you are.
Together we’ll take a look at four different options. Each has its pros and cons and associated costs – either monetary or time based.
1) Strut your own stuff
If you happen to be a multi-talented individual who feels as comfortable in front of the camera as behind, this may be a great option for you. You have complete creative control and will likely be the person most enthusiastic about your product (at least in the beginning!).Pros – If you have your own camera and a suitable space to photograph yourself in, then all of a sudden you are a package deal. You can work when you feel like it and won't have to deal with scheduling difficulties.
Cons – This would probably be one of the more frustrating and time consuming options; ask anyone who has photographed their own self portrait and they will tell you that it is a difficult task.
You also need to have at least a basic knowledge of photography and the art of modeling (yes, it is an art).
All of the clothing has to fit you.
Cost: $0, except you may get a few gray hairs...
2) Ask a friend
When I first started out in photography, this was my go-to option for everything. And let’s face it, in today’s culture most everyone wants to be photographed. It is likely that many of your friends will be thrilled that you asked them to model for you.If you don’t own your own camera, or don’t feel comfortable enough to be the photographer, this is also an option you can go to in order to have someone else photograph your work.
The fun part of this option is that most of us have a pool of friends who are very talented; some can do hair & makeup, others are creative conceptual geniuses. If you are able to get them all on board, your photoshoot could be a symphony of mind-blowing proportions.
Pros – Your friends will most likely say yes and will model/photograph/do makeup/ brainstorm for free. (I always order a pizza or two as long
we keep those greasy fingers out of the studio!!)
They have pictures for Facebook/Myspace, and that will generate some word-of-mouth advertising for you.
That photographer and/or makeup artist friend of yours may be able to turn in the images that you take together for a class assignment or use it in a portfolio.
Collaboration is amazingly satisfying.
Cons- We all have a few flaky friends. Sometimes getting a shoot organized can be difficult.
Will your friends take the shoot seriously or will they goof off? If they are simply there to have fun, this can be a serious strain in the relationship for the future.
Unless your friend actually is a model (or a religious watcher of America’s Next Top Model) they may not know how to model your clothing and the pictures could end up simply mediocre.
If you ask “Suzy” to model, but you don’t ask “Jane” there could be a crisis in your friendship. You could spend more time putting out fires and repairing fences than is necessary
Cost: $0-$30, depending on the price of pizza.
3) TFP (Time for Prints)
So maybe none of your friends have the shape or the look to fit your clothing; maybe they are just camera shy. Either way you are now left with the reality that you have to find a real model to pose for you.There are a lot of different resources to find models and photographers who will work on a Time for Prints basis. You may also see people advertising their services on a TFCD basis. This means Time for CD. Essentially all that they want out of the deal is a couple of good images for their portfolios.
What I love about this system is that it is all about bartering. We each have something to offer each other: you as a designer get someone to model and/or photograph your clothing. The photographer and the model each get much needed images for their portfolio.
While you can find some fantastic professionals who will work on a TFP basis, for the most part you may be working with many amateurs. You have to be very diligent in reviewing people’s portfolios to make sure they can provide you with the images you want.
Once you have a couple of interested parties lined up, arrange to meet with them! Grab a cup of coffee and get a feel for the person. Possibly take them up to your studio and let them take a look at your work. Gauge how they react to your work. Remember, you want to work with someone who respects what you create. Ideally try to find someone who falls in love with your clothing; not only will they have potential to be a better model, but again you will get great word of mouth advertising!
Also keep in mind that this is your opportunity to help promote other artists! If you find a great model/photographer/makeup artist, let the world know! Add a thank you to them and a link to their work somewhere in your shop. Tweet about them, blog about them. You get the idea!
Pros – There are a ton of sights dedicated to helping models, photographers, designers, and makeup artists connect. Check out sites like http://www.onemodelplace.com and http://www.modelmayhem.com to start.
You can also post free ads on Craigslist and any web forums that you may be active on.
You can retain creative control and direct where and how the shoots will be conducted, as well as guide the concept and look of the shoot.
You can find great people to work with and build a relationship; eventually you might have a great team to work with!
Cons – Unfortunately there are a lot of people out there who want to be models & photographers because of the supposed glamour of the industry. You will have to wade through a lot of unsuitable hopefuls in order to find exactly what and who you are looking for.
There may be ego involved. If you are not established yet, make sure not to let anyone walk all over you. Remember, you are still providing a service!
Cost: $0 (pizza optional), however the cost in terms of time to research and interview may be high.
Let’s face it – money talks. If you are handing someone a paycheck after a shoot, they will consider you legitimate and will most likely check their ego at the door.Also when there is an exchange of money, you gain certain legal rights as a contractor. Essentially when you agree to hire someone for a shoot and you have set the parameters (date, time, location, duration) and they agree, you have created either a verbal or a written contract. If they renege, you have a little bit of recourse. If a model does not show, you may be able to bill him or her for your time.
You may also get better results with a professional. But don’t ever assume that someone knows what they are doing just because they are selling their services. I have seen many awful professional photographers out. So, again, do your homework. If you are going to pay someone to either model your creations, or to photograph them, make sure that they are worth every penny that you are paying them!
Another important area to research is what a professional photographer’s policies are in terms of ownership. Do they own their negatives – meaning that you have to pay them for every single image used? What exactly do you walk away with after the shoot? Will they make you sign a release so that they can use images from your shoot to advertise themselves? Read all of the fine print that they put in front of you!! If your landlord or your uncle is a lawyer or your friend is in law school, have them take a look at everything before you sign it! You are your brand and you want to make sure that no one can take advantage of that.
I recently photographed a well-known public speaker and soon-to-be-published author. Because of the nature of his work, he could not sign a model release. We did, however, agree that I could use the book jacket with my image of him for publicity purposes – anything beyond that I would run by him first.
Find a photographer who respects what you do and who is willing to negotiate, if need be!
Pros- You’re working with professionals. Their name is on the line – they will likely deliver the best possible product that they are capable of producing.Find a photographer who respects what you do and who is willing to negotiate, if need be!
You can be very specific in your wants and expectations for the shoot; after all, you’re paying for it!
You can pre-interview everyone. If they don’t meet your needs or don’t jive with your sensibilities, you can move on to the next candidate.
Legal recourse – hopefully it will never come to that. If it does, you have that in your back pocket.
Cons – Expense! While the cost of hiring professionals can vary, you will be shelling out cash one way or the other.
You have to also consider how cost effective it is to pay someone – can you shoot enough clothing and then sell enough clothing to make a profit after the cost of models and photographers?
Cost: varies; expect to spend at least a modest sum.
So that’s a lot to take in and consider. Before you jump to one option or the other, take a look at your company and ask yourself what you need and what you can afford. Do you need high end images? Is that even what your company is about?It is important to understand your customer base and know what kind of images they will be most drawn to. It may very well be that a snapshot of your friend having a great time and wearing your clothing is exactly what your market will be thrilled with. So do a little research. Also take a look inside and ask yourself what you want to express with your product and with your images. Do you know how to create those images? Would a local college student enrolled in the photography department know how to do it?
My overall advice is to find people that you enjoy working with and continue to work with them. Whether they be your friends, aspiring artists, or professionals – if you have a great rapport, it will show!If you ever have any questions, you can always drop me a line and I will do my best to give you an answer. Email me at Jen [at] Jenkiabaphotograpy.com
Jen Kiaba is a professional photographer and the owner of Jen Kiaba Photography. She consistently works with artists, models and designers in creating vibrant and exceptional images for their portfolios. With years of experience under her belt, she is also passionate about helping young models and designers connect to create fun and fresh images to promote their products. To check out her work, visit http://jenkiabaphotography.com
Friday, May 22, 2009
Weekly Inspiration
I'm not sure it this was meant for the web, postcards, or some other print media but it just has everything going for it. Wonderful photography, composition, design, and gorgeous colors.
Submit your photos for consideration as a Weekly Inspiration by adding them to the Flickr Group.
Wednesday, May 20, 2009
Book Review: Craft Inc.
 Welcome to the first ever book review for the Handmade Business Blog. I'm a bit of a book addict so this is fun. I know I said there would be a guest post this week but it's not ready so it may run instead of the usual Friday or Monday post instead.
I recently bought a copy of Craft Inc. Turn Your Creative Hobby Into a Business by Meg Mateo Ilasco. This is a very well written book, the author has an approachable conversational style of writing which I enjoy.
This book has a breakdown of various issues a person starting up a handmade business needs to consider. I think the strongest chapter is called "Your Business Mind" which covers things like registering your business, accounting, writing a business plan, etc. These are topics that no one really enjoys and so there's a tendency to want to ignore this area.
Pros:
- Good interviews with entrepreneurs
- Covers a variety of important topics like pricing, marketing, craft shows, selling online, etc.
- Emphasizes the nuts and bolts of running a business without being boring.
- Discusses how to stay moptivated and having realistic expectations.
- Delves into how to handle growth and when you should consider delegating some of the work.
- Not as in depth in some areas as I would like, such as the press kit section.
- Doesn't give references to check out for further information. For example: when talkign about trademarking a link to the US Patent and Trademark Office would have been useful.
- I think some visual examples would have illustrated some of her points better than just describing them.
Monday, May 18, 2009
Link Roundup - Logo Design
Software:
I love open source software, partly because it's free and also because most of it is cross platform and can run on many operating systems.
I really recommend using a vector software to create the logo because it makes scaling the logo up or down very easy and without loss of quality.
Inkscape - Vector image software. Not quite as powerful as Adobe Illustrator but still very good and with all the most common tools.
The GIMP - Powerful image editing tool comparable to Photoshop
Tutorials:
Step-by-Step Logo - I don't know about you but I love to see examples of how other designers work—they reveal better (or worse) ways of doing things and allow me to gauge whether my methods are mainstream or totally whacked-out.
Logo Design Process Tutorial - One of the main aspects of the branding process includes logo development.
Graphic Design 101 - Lots of resources covering graphic design
The Basics of Graphic Design - This tutorial examines the process of graphic design for printed publications, presentations, and web sites.
Font Resources:
Many logos include text so you need a good font. There are loads of good free or inexpensive fonts available online, here are a few good sources.
Blambot Comic Fonts and Lettering - These are some very fun fonts which are good if you want something inspired by comics, pulp covers, or science fiction/horror films.
dafont.com - Large collection of free fonts of varying quality
40+ Free Fonts for Professional Design
Friday, May 15, 2009
Weekly Inspiration
Here's a beautifully composed product photo.

Submit your photos for consideration as a Weekly Inspiration by adding them to the Flickr Group.
Wednesday, May 13, 2009
Establishing a Theme
 This week's long post isn't going to be very long. I had planned to do a book review but my books didn't arrive in time for me to be able to finish reading and absorbing the information. So instead I'm going to write a few ideas about branding.
Is there something special about your products that you want people to associate with you? This can be a tough question. For me it was pretty easy, I make jewelry of cephalopods (squid, octopus, cuttlefish) and so I would love for people to think of me when they think of an octopus.
So once you've answered that question it can be used as a starting point for your branding efforts. We'll use the example of someone who makes bags with screenprinted daisies.
White, green, and yellow are colors associated with daises, you could tailor your website, banners, business cards to have that those colors.
Design your logo to have daisies working into it.
At craft shows have vases filled with fresh cut daisies.
Shrink down some of the designs from the screenprinting and have them made into rubber stamps. Rubber stamp them on your packaging, notecards, invoices, etc.
Monday, May 11, 2009
Want to Write a Guest Post?
I could use some help from my readers. My area of experience is in selling jewelry and sculpture, so I would love to be able to feature articles about selling other products.
Type of topics I'm looking for:
Type of topics I'm looking for:
- Hiring and working with a model (or how to convince friends to model) for clothing photography.
- Getting started selling candy or other foods online.
- Sources for sewn in clothing tags or how to make your own.
- Wholesaling your products.
Quick Tip #6 - Create Impressive Slideshows
Slideshows are a perfect way to show off your products. There are a number of options for creating video slideshows that you can then upload to youtube and use to promote your shop.
Tips
1. Make sure you add your website/shop url to the video description so people can click it. It should also be in the credits of your video.
2. Get good music. Some services offer music you can add and Podsafe Audio is also a great resource for music (most is under creative common licenses, with artist attribution required). Make sure any music you use is available for use in videos or you risk having your video pulled by YouTube.
3. Give your video good tags, for example etsy, handmade, jewelry/soap/clothing/etc. and put it in the appropriate category (How To & Style works for most handmade stuff)
4. Get the word out. Embed the video on your blog, add it to facebook and other social networks, add it to a Squidoo lens, etc.
Online Slideshow Makers
I'm only linking to online slideshow makers since they should work on any operating system. There are a number available online for download and you can also use most video editing software to make them too.
Friday, May 8, 2009
Weekly Inspiration
From the new Flickr Group. Some nice packaging and photography.
Submit your photos for consideration as a Weekly Inspiration by adding them to the Flickr Group.
Wednesday, May 6, 2009
Flickr Group
I just started a Flickr Group for the blog. Join and add your handmade business related pictures to the pool. I'll pick the Weekly Inspiration from the group as often as possible (hopefully every week but I don't expect that until the group has grown some).
Handmade Business Flickr Group
Handmade Business Flickr Group
I Create a Shipping Center
This article is being written as I do what I'm writing about. I'm tired of scrambling to gather all my shipping stuff when I get an order. It was all more or less in one place just as a big messy stack of stuff with no organization. So here we go.
I'm only working with what I currently have and it has to fit in a corner of the room.
Before
I'm a bit embarrassed to put this picture but we need a before.

Storage
So since I'm committed to doing this with what I already have I need to consider the storage I have available.
I'll spare you the horrendous photos of how messy my living room got during this process. Suffice to say you can't organize anything without first tearing everything apart to sort through it.
Here's the result of my efforts. It's not pretty but it's neat and functional. I hope it inspires you to consider how your shipping and studio is organized.


I'm only working with what I currently have and it has to fit in a corner of the room.
Before
I'm a bit embarrassed to put this picture but we need a before.

Storage
So since I'm committed to doing this with what I already have I need to consider the storage I have available.
- 1 wide plastic set of drawers 24 inches wide 36 inches tall
- 1 narrow plastic set of drawers 12 inches wide and 36 inches tall
- plastic shoe boxes
- Various cardboard boxes
- Various other storage containers
I'll spare you the horrendous photos of how messy my living room got during this process. Suffice to say you can't organize anything without first tearing everything apart to sort through it.
- First of all I need a flat surface to construct the packages on and keep my scale. The top of the wide plastic drawers works great. The shipping area is directly across from my computer so I can just wheel the chair over when I need to pack things.
- On the top of the drawers are my postal scale, box with gift bags, receipt book, calculator, packing tape, scotch tape, scissors, box cutter, business cards, box of brochures and promo packs. Also some packing paper that didn't fit anywhere else.
- Small flattened boxes went in the bottom drawer. Larger flattened boxes tucked between drawers and wall.
- Tissue paper saved from orders, gifts, etc. in a cardboard box. Box then went into the top drawer.
- Bubble wrap in the top drawer.
- Envelopes, extra packing tape, small box of saved packing peanuts, and other miscellaneous small items in the middle drawer.
- Assembled boxes arranged in a neat stack. Larger boxes stored in downstairs closet until needed.
- Less frequently used items stored in the smaller set of drawers that has been moved to where the larger one used to be. In it are gift boxes, ribbon, wrapping paper, etc.
- Next to the small drawers are some more boxes.
- Hung my t-square on the wall, I use it for cutting down over sized boxes.
- Packed up the art paper, mat board, and other stuff that didn't belong in boxes and they're stored downstairs as well. Organizing my paper is for another day.
- Threw out a lot of trash and broken boxes. The stool with my pasta machine went back where it belonged next to my art desk.
Here's the result of my efforts. It's not pretty but it's neat and functional. I hope it inspires you to consider how your shipping and studio is organized.


Some Links on Organization
Monday, May 4, 2009
Link Roundup - Finances
 This weeks links are all about finances. Learning to track how much your making and spending. I could easily make this a list with hundreds of links but I decided to pick just a few that have the most information.
Small Business Bookkeeping & Accounting
SBA Small Business Planner
Big List of Free Business and Office Software
Friday, May 1, 2009
Weekly Inspiration
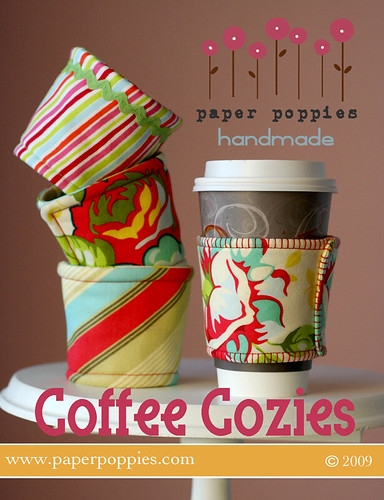
Here's the first ever edition of the Weekly Inspiration. I hope to do one of these every Friday highlighting a few cool pieces of packaging, design, etc.
This week's find from Flickr.
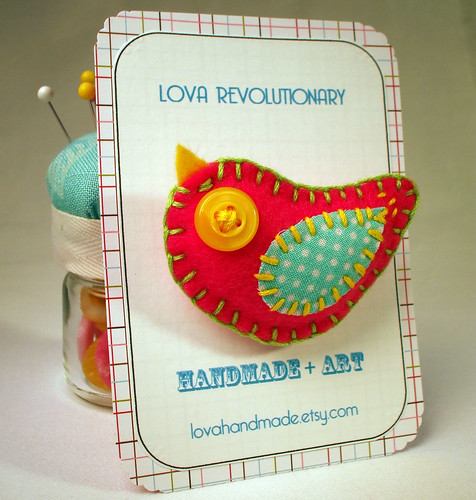
Spring Time Felt Bird Brooch Hot Pink Yellow Aqua Polka Dot Vintage Fabric , originally uploaded by lova revolutionary.
Subscribe to:
Posts (Atom)